
Excel 2024: Display Online Pictures In a Cell Using a Formula
April 12, 2024 - by Bill Jelen

The IMAGE function debuted in August 2022. It is only for online images that are available through a URL.
The simplest case is =IMAGE(url). The first time you use it, Excel will show the #BLOCKED error and you will have to enable external content.
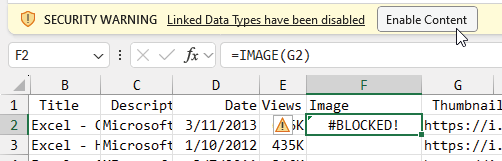
After you enable the external content, press F2 and Enter on the Image formula to have it re-render. Initially, the image will be resized to fit the cell.
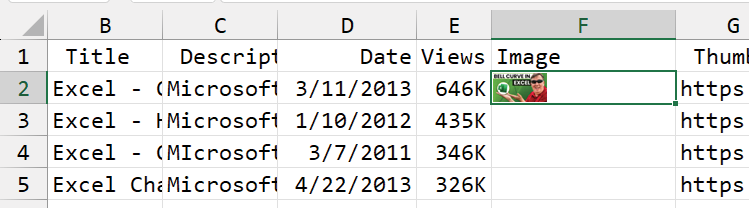
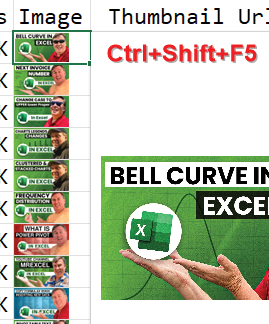
At this point, you could double-click the fill handle from cell F2 and the formula will copy down and you will have an image for each row in the data. Initially, the images are all very small. You can choose any cell and press Ctrl+Shift+F5 to see a larger preview of the image.
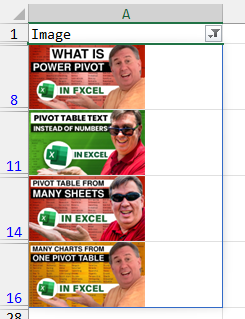
The complete syntax for the IMAGE function is =image(source,alt_text,sizing,height,width). You will unlock some cool features if you include Alt Text. In my case, I have the video title in column A and that would make perfect Alt Text. Change the formula to =IMAGE(G2,A2).
The Alt Text that you specify in the formula will travel with the photo. You can bring the photos to other places by using formulas such as INDEX or XLOOKUP. In the following image, an formula brings the images to a dashboard. I've added a heading and turned on the filter drop-downs. When I attempt to filter by this column, the alt text appears in the filter drop-down. I can search for all photos about pivots.
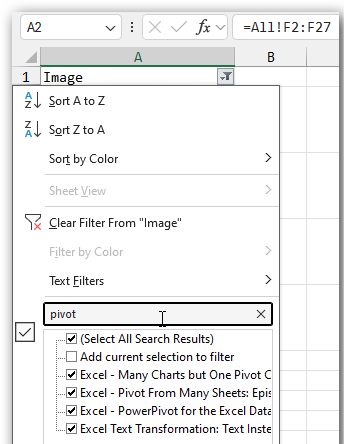
The result will be just the images that have "pivot" in the alt-text.
You can also sort the data by the image and Excel will use the Alt Text for the sort order.
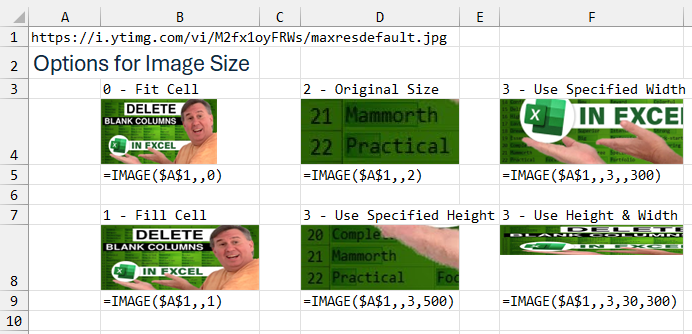
The other arguments in the IMAGE function control the image size. First, understand that the image will never be larger than the cell. If you want a larger image, you need to increase the row height and column width (good) or merge a bunch of cells (evil).
In my opinion, the most useful image size setting is 0 to Fit Cell. The image will appear as large as possible, with either the row height or column width being the constraint. The rest of the cell is white space. This keeps the aspect ratio of the image correct.
If you change the size to 1 for Fill Cell, then the picture will be stretched or pinched to fill the entire cell. A setting of 2 keeps the image at the original size, but only shows you a portion of the image. A setting of 3 allows you to specify height, width, or both. Specify either height or width to keep the aspect ratio correct. If you specify both height and width, then the picture will stretch.
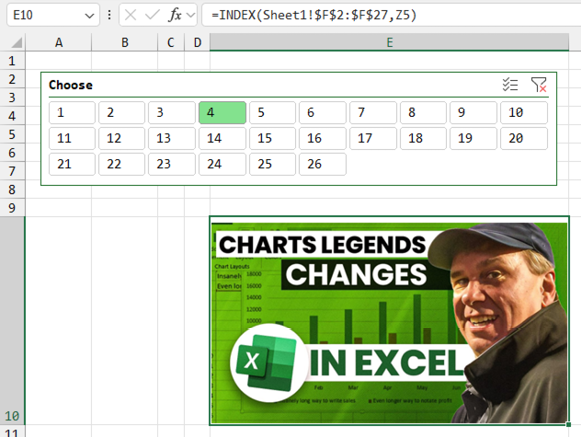
In this example, a slicer allows you to choose which image shows in a single large cell.
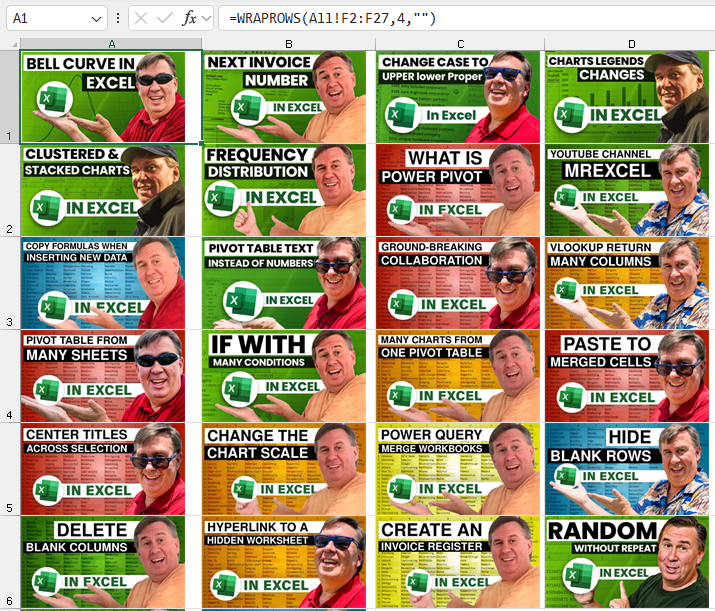
Below, the WRAPROWS brings all of the images into a dashboard.
Caution: The moment that you use the IMAGE function for a particular image, the current version of the image is cached in the workbook. If the image later changes on the website, your version in the workbook will stay the same. The only way to get Excel to refresh that image is to use Move or Copy Worksheet to move the sheet to another workbook. I don't like it either, but I don't suppose it would have been good to have Excel bringing the images in on every recalc. People smarter than me thought about this and came up with the current implementation.
As soon as the IMAGE function came out, many of the beta testers pleaded with Microsoft that we will really needed a way to embed images that were stored locally instead of online. It took ten months and the result was not what any of us expected. Read on.
This article is an excerpt from MrExcel 2024 Igniting Excel
Title photo by Matt Roskovec on Unsplash